


A well know construction problem on the 3MA engine is the location off the reedblocks.
Du to the fact the carbs are placed in frond, space is very limited.
Therefore Yamaha needed to tighten up the whole construction, to get room for the carbs, airbox and fairing between frond wheel and engine.
To tighten up the whole construction, first thing to do is to locate the reedblock as tight as possible towards the crank.
And that they have done, here you have two situations.
1) with reedstoppers removed
(To show the tight fit of the reedblock it self)
2) with reedstoppers
(To show how tight the reedstopper is compared to the crank)
This is on it self already ''less ideally'', but if you look to the function of the boosterport.
Its as worst as it can get.
(situated here with reeds fully open)
Therefore like to experiment with reedspacers.
Got two sets different thicknesses to experiment with and the third set is in the making.
-8mm spacer
-12mm spacer
-20mm spacer
(Reeds fully open) with a 8mm spacer.
Boosterport half open
(Reeds fully open) with a 12mm spacer.
Boosterport almost open
(Reeds fully open) with a 20mm spacer.
Boosterport fully open.
What can we expect?
From what I have been reading, reedbloack spacers are enlarging the crankcase volume. And by enlarging the crankcase volume you lose a bid at top RPM and gain a bid in the midsection (roughly saying)
This would also be the case on the 3MA, BUT I'm hoping that by opening the boosterport it gain's us a bid more.
And by making some space between crankcase and reedblock the fueling problem get less as it axially now has room to flow
Update: 24-08-2015
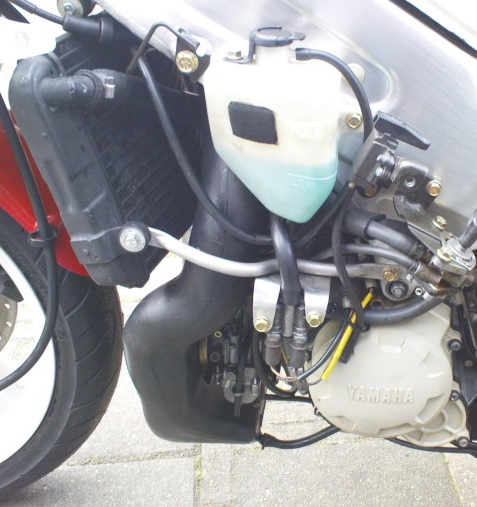
Because the 20mm spacers are the biggest, I needed to know if they fit and if I have enough wheel space to drive to my dyno.
So this is the first thing to check, as you can see it has the stock 4 petals reedblock fitted.
Did not touch the reedblock stoppers, they still are set on stock wideness. (12mm)
(will leaf them un thatched to get a good comparison what the spaces do)
As you can see by adding the 20mm, the reedblock is half inside the spacer.
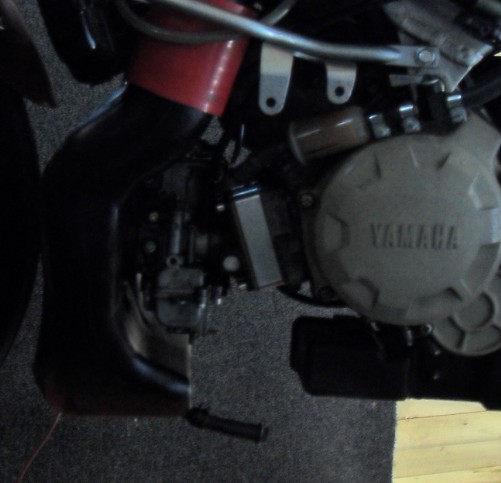
Here they are fitted, giving a nice look the whole setup.
And with the airbox fitted, it looks like its tight but good enough to drive to my dyno for testing
Driving easy of course (lol)
Knowing that the biggest reedspacers do fit, going on to the next step.
-Ordering some new reedblock gaskets
-Make sure I have all the correct bolts length for the three spacers.
Udate 05-09-2015
Well got all ordered parts.
- gaskets
- each set has it correct bold length's
The somewhat old fuel tap leaks a bid, so mounted a extra inline fuel tap witch I can close manually.
Just to make sure no fuel is leaking.
Its back and running. Hope to test all spacers soon
Update 11-09-2015
The results are great, very impressive. Did four runs for each spacer or change.
Displayed the most logical. (As there are slight differences (0,1 a 0,2hp) in each run)
All runs where done with ignition curve 0 (Close throttle position)
Here you have the 8mm Spacer.
Kicking out a 65,1HP (Gained a bid compared with the 64,7HP with stock reedblock setting) (link)
Here you have the 12mm Spacer.
Kicking out a 66HP (This gave the best results, compared with the 20mm or 8mm spacers)
Here you have the 20mm Spacer.
Kicking out a 64,8HP (With the 20mm you start loosing power, but the engine revs higher)
To see if I could gain a bid more, I opened the reedstopers from 12mm to a 19mm, in combination with the best spacer (12mm)
With good results, now its kicking out a 66,5HP
Here we have the 12mm vs 20mm spacer
Best stock run (with shortened pies and the 0 curve) vs Best 12mm spacer (with opened stoppers)
Stock pipes (and the 0 ignition curve) vs shortened pipes 0 curve (12mm spacer, opened stoppers)